Contract Document records can be sent out for Approval on an individual basis and independent from its associated Contract. As the Approval request sent will be for the Contract Document record, this record may contain multiple documents.
Open the related Contract and go to the Documents tab, click on the Document record you wish to send for Approval.

This may open up the Document record in full screen rather than a pop up, if this does not happen you can click on the expand button on the top right of the record to open the pop up to a full screen view.
Note: Expanding the screen is not necessary to create the Approval but will allow you to see the Approval record when created.

Once in full screen you will see that the Document record now has its own set of sub tabs, one tab will be 'Approvals'.

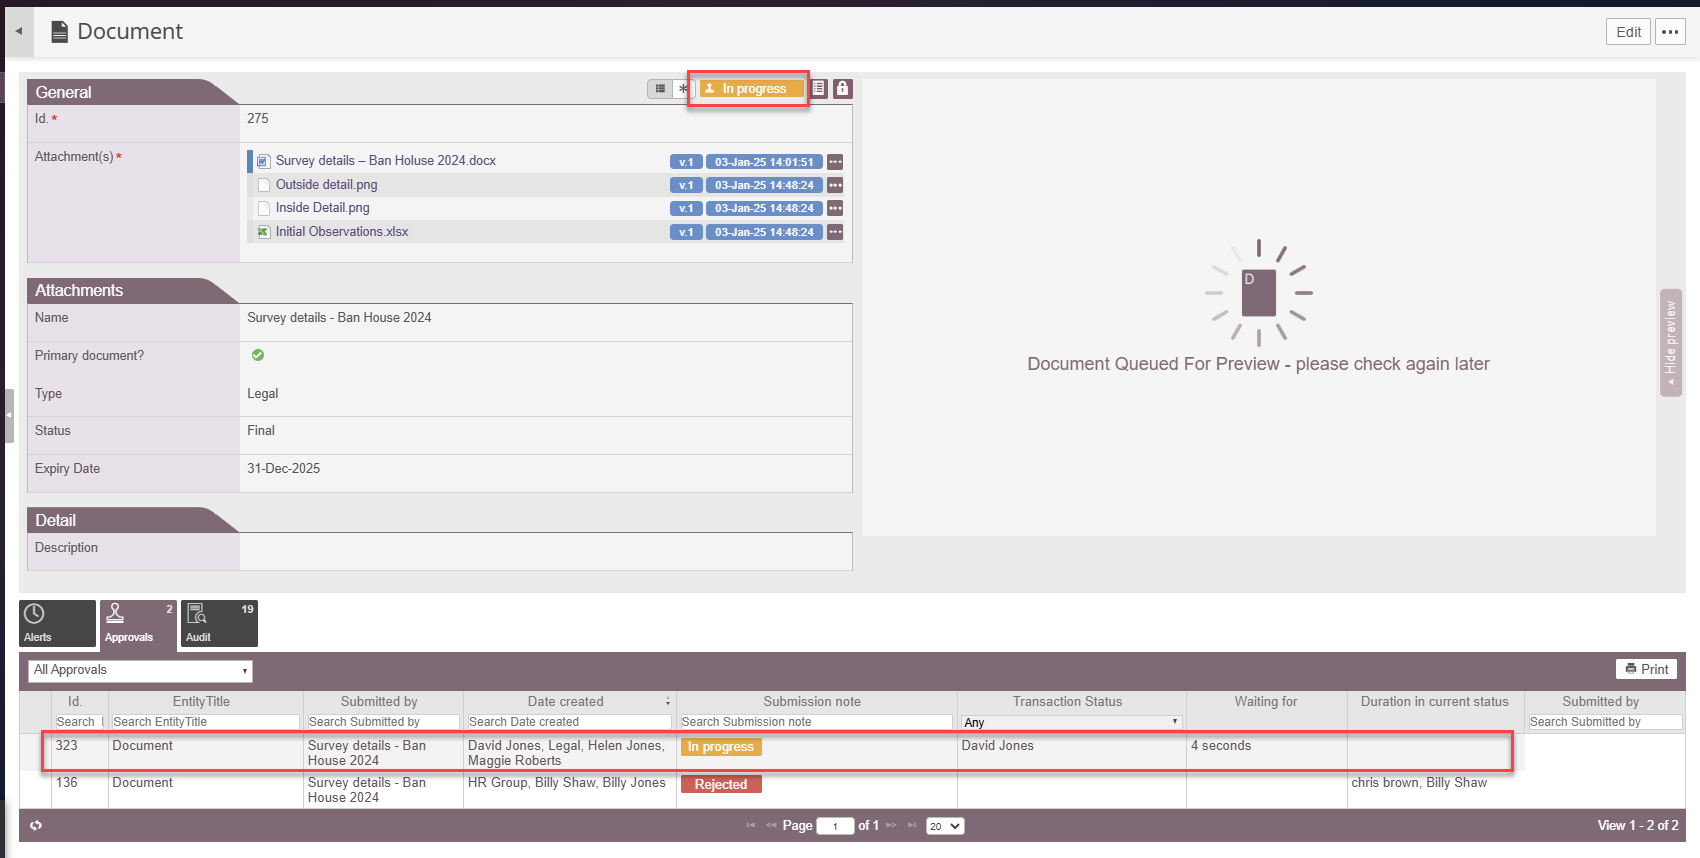
Any current and previous Approval requests for this Document record will be displayed here.
This status is independent of the Contract record Approval status. A Contract record could have an Approval status of [Approved] but the document records linked to it could still have an Approval status of [Pending].

Click on the [...] icon on the top right of the record and select the option for [Start Approval]

A pop up screen will appear allowing you to select an Approval Rule or create one manually. The default value will be to allow you to select Approvers manually but if you have a pre-defined Contract Document approval Rule that this Document falls into the criteria of then it will be displayed in the drop down list for you to select.

To create an Approval manually you must define how you wish the Approval flow to progress:
- Sequential - each Person / Group are notified in turn
- Parallel - all Persons / Groups are notified at once
Select all the relevant People / Group using the drop down list. The selected values can be moved around to define the order by using box's at the end of each value via drag and drop.

If you select an existing Rule from the drop down list then the pop up will update and remove the Select Approvers option

If you wish to view the details of the selected Rule you can click on the cog icon and the Approval flow screen will open showing you the steps for the Approval Rule you have selected. Click [Close] to go back to the Start Approval pop up.

For more information about how Approval Rules are created using the Approval Flow screen please click here.
Click [Next] - There will be an option to add a Submission Note to the Approver's, once saved, the People / Approval Groups will receive an email requesting Approval at the appropriate stage.
Note: At this stage if you have selected a User that have been unseated (licence removed) then the system will warn you of this so you can go back and adjust - we cannot prevent you from selecting an unseated User but we can warn you that you so you can made adjustments.
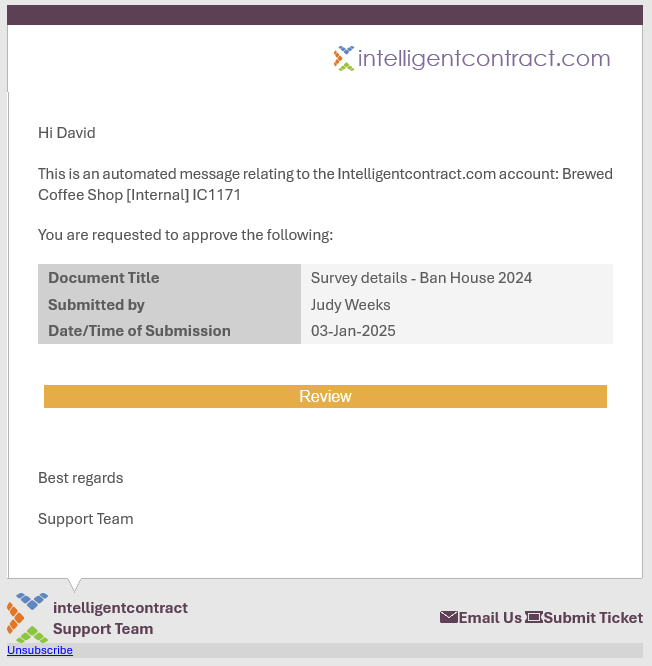
An Approval request email will be generated.

Your Document Approval Status will now display as [In Progress] and a new Approval record will appear in the Approval tab.

The [Approval Activity] button can be used to view the full details of the approval request. For full details about the Approval Activity screen click here.
Once all Approvers have actioned the status will update to [Approved] or [Rejected]
